
How Do You Hook Up a Wireless Microphone to a PA System?
Apr 03, 2025Today, we’re detouring a bit from stage lighting, and diving into stage audio! Let's start with a fundamental but crucial topic—how to connect a wireless microphone to a PA system.
Understanding Your PA System Setup
Before we get into the connections, it’s important to recognize what you’re working with. Let's assume your PA system is already set up, and now you’re introducing a wireless microphone. In this guide, I’ll be using a handheld Airwave Wireless Microphone, a brand we love for its reliability.
Step 1: Identifying Your System’s Inputs and Outputs
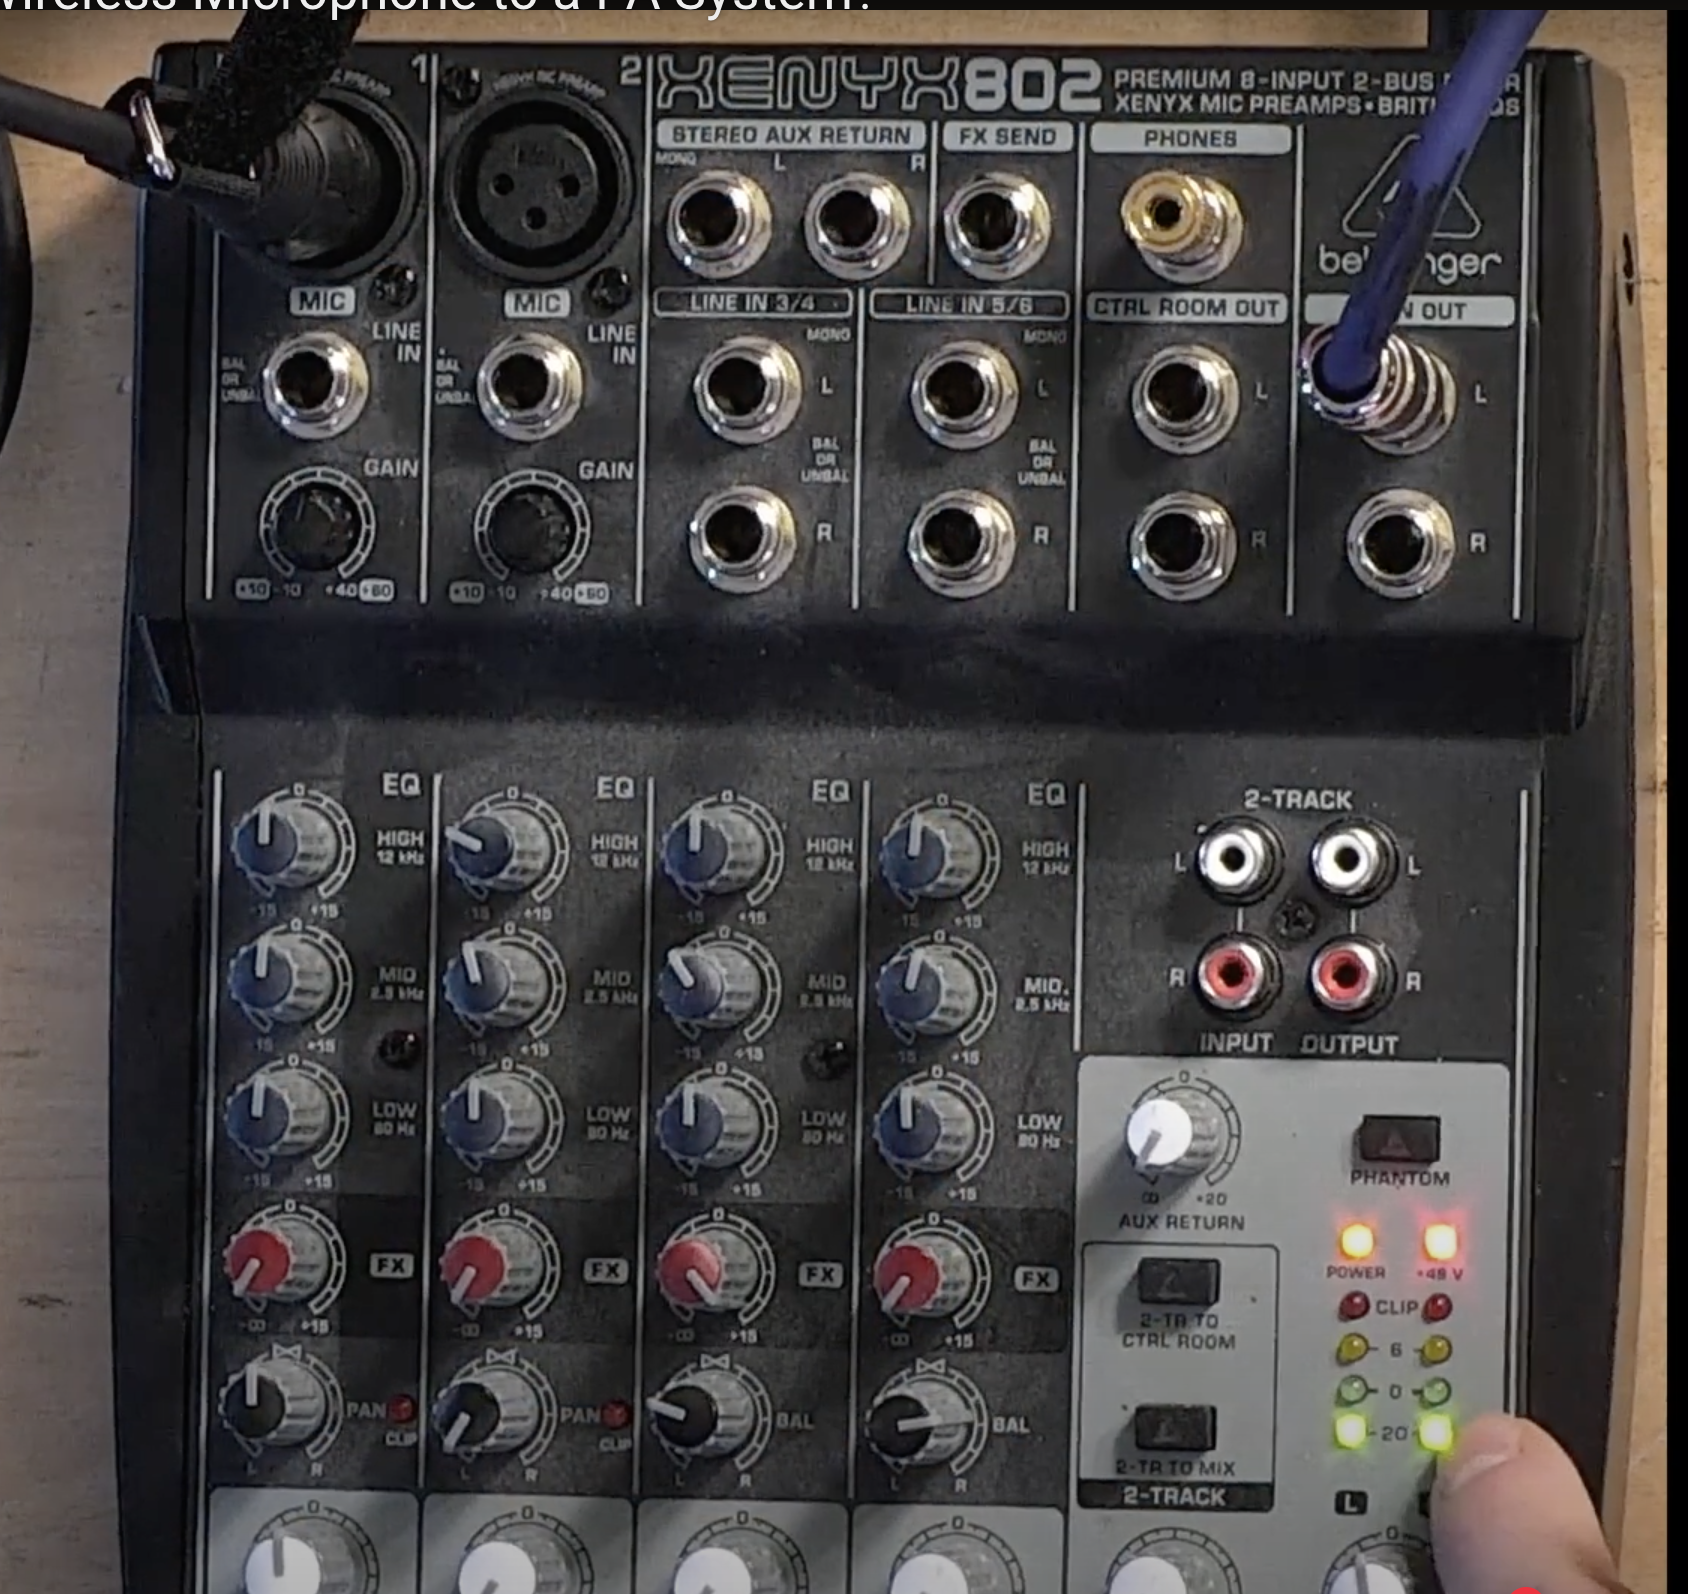
Most PA systems will have a mixer, whether it’s an analog or digital one. The first thing you need to do is determine the available inputs and outputs on your system. In my example, I have a basic analog audio mixer with quarter-inch outputs but no XLR outputs, and we're going into another mixer in this case. This means I need to adapt my connections accordingly. Let's go over a few scenarios.

Step 2: Understanding Wireless Microphone Outputs
Wireless microphone receivers typically offer different output options:
- Separate and combined channels
- XLR Balanced Output (Common for professional setups)
- ¼-inch (6.35mm) combined Output (Often used for more compact systems)
My Airwave wireless microphone receiver provides both options. I’ll be using XLR output, which is the most common method when connecting to a PA system.

Connecting Your Wireless Microphone to the Mixer
-
Connect the XLR Cable:
- Take the female end of the XLR cable and plug it into the receiver’s XLR output (and if you don't have good ties to keep these cables organized, check out The Best Cable Ties You've Ever Used here at Above AVL!).
- Connect the male end into an available channel input on your mixer (e.g., Channel 2).
-
Understanding the Mixer Controls:
- Gain (Trim): Controls the input level of the microphone. Start with this turned all the way down.
- EQ (Equalization): Adjusts tone frequencies (low, mid, and high). This will help fine-tune your mic’s sound.
- Effects (FX): Some mixers offer built-in effects, or through an aux input. If needed, you can adjust accordingly.
- Pan: Sends the signal left or right in a stereo setup.
- Main Fader: Controls the overall level of that channel.
Connecting to Your PA System
If your mixer has XLR main outputs, use an XLR cable to connect to the PA system. However, if you only have ¼-inch (6.35mm) outputs, you’ll need an adapter to convert it to XLR or another compatible input for your PA.
- If using ¼-inch to XLR, make sure to use a TRS (Tip-Ring-Sleeve) cable, which is balanced and prevents interference.
- If using ¼-inch to ¼-inch, opt for a balanced TRS cable (two rings with three segments of metal).
Setting Audio Levels Correctly
- Start with the gain turned down.
- Slowly increase the gain while speaking into the mic until you see a signal but avoid clipping (distortion).
- Adjust the fader levels:
- Set the channel fader at an appropriate level.
- Adjust the main fader to match the output levels.
- Check your PA system meters to ensure you’re not overloading the signal.
Pro Tip: Keep Levels Balanced
If I'm going from one mixer to another audio mixer, typically on that other mixer I'm going to have the gain turned all the way down, because I have a strong signal coming out. A good rule of thumb is to keep your channel fader and main fader at zero and adjust gain accordingly. That means the meter will show me where I'm at on the channel level, it's going to match because everything's at zero, or it should in most cases. This ensures a clean signal without distortion.
Expanding Your Setup: Adding More Wireless Microphones
If you need multiple microphones, simply:
- Connect an additional XLR cable from each receiver output into separate mixer channels.
- If you only have one available input, some wireless receivers (like the Airwave) offer a combined output for two microphones, though this limits independent control.
Wrapping Up
Hooking up a wireless microphone to a PA system is straightforward when you understand the components and connections. Remember to:
- Identify your mixer and receiver outputs.
- Use the correct cables and adapters.
- Adjust gain and faders carefully to avoid distortion.
- Consider expansion options for multiple microphones.
If you found this guide helpful, subscribe to our Learn Stage Audio channel for more tips and tutorials! Also, check out Above AVL for all your audio, video, and lighting gear needs. We'd love to help answer your questions. Thanks for reading, and happy mixing!
HOW TO BEGIN WITH LIGHTING
Getting started with lighting is difficult. What tools do you need?
How do you know if what you're buying or using is the right solution?
Let me send you a FREE guide to help you begin with lighting:

